
How to Choose the Right Power Tiller Parts?

Choosing the right Power Tiller Parts can determine whether a machine works smoothly or struggles in the field. A worn belt, weak bearing, or poorly matched blade may increase vibration, fuel use, and repair costs. The correct part must fit the tiller’s model, engine output, shaft size, and working conditions.

Agricultural machinery engineer Dr. R. K. Jain emphasizes, “A replacement part is reliable only when its specification matches the machine’s actual working demand.” This practical view matters for farmers and maintenance teams. Before ordering, inspect the original component carefully. Measure the shaft diameter. Check bolt spacing. Compare the manufacturer’s part number. A photograph helps, but it cannot replace accurate measurements.

Field experience also reveals details that catalogues often miss. Mud can damage seals faster than expected. Rocky soil can bend ordinary rotary blades. Frequent transport may loosen fasteners and crack protective covers. Choose durable materials, but do not assume the most expensive option is always the best. Some low-cost parts perform well in light soil, while heavy-duty components may waste money on small plots.

There is no perfect choice.

A careful buyer should review supplier credibility, warranty terms, installation guidance, and return policies. Ask whether the Power Tiller Parts have been tested under similar conditions. Genuine parts usually provide clearer specifications and better support. Still, even experienced operators can overlook compatibility details. That is why a short inspection before purchase remains valuable. The best decision balances fit, durability, service access, and realistic operating demands.
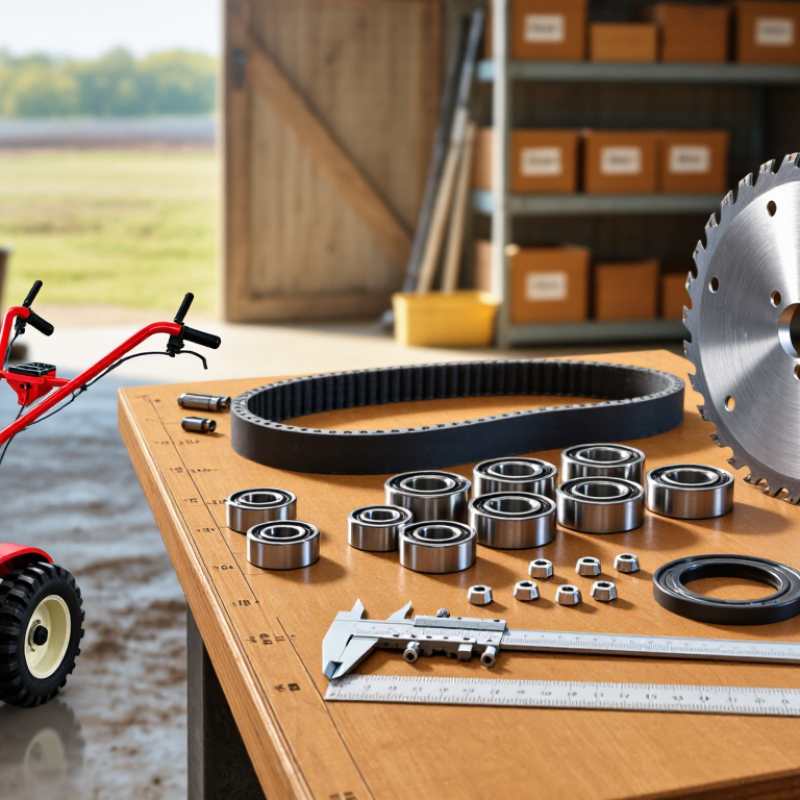
How to Choose the Right Power Tiller Parts?

Understanding Power Tiller Parts and Their Functions

How to Choose the Right Power Tiller Parts?

Understanding each power tiller part makes replacement decisions safer and more accurate. The engine supplies power, while the gearbox controls speed and torque. The clutch transfers movement to the transmission. Wheels provide traction, but rotary blades perform the actual soil cultivation. These functions are connected. A weak belt can reduce blade speed, even when the engine sounds normal.

Check the part’s dimensions, mounting holes, shaft shape, and operating load before purchasing. Seals should resist oil leakage around rotating shafts. Bearings must turn smoothly without grinding or side movement. Blades need suitable thickness and correct cutting angles. I once replaced a worn belt without checking pulley alignment. The new belt failed quickly. That mistake reminded me that compatibility involves the whole system, not one measurement.

Tips:

Clean dirt from the assembly first. Photograph connections before removal. Compare the old part with the replacement. Read the equipment manual carefully, especially torque values and adjustment instructions. Inspect bolts, pins, and guards during every repair. Small cracks deserve attention. Do not ignore unusual vibration, because it may indicate a bent shaft or loose fastener. When uncertainty remains, consult a qualified technician or an authorized technical document. My own inspections are not perfect, and I sometimes recheck a measurement twice. That extra minute is usually cheaper than another repair.

Identifying the Correct Part for Your Power Tiller Model

How to Choose the Right Power Tiller Parts?

Identifying the Correct Part for Your Power Tiller Model

Finding the correct power tiller part starts with the machine’s identity, not its appearance. Locate the model plate near the handle, frame, or engine housing. Record the model code, production year, and serial number carefully. One missing digit can lead to an incorrect order.

Check the owner’s manual or an authorized parts catalogue for the exact reference number. Compare shaft diameter, mounting holes, belt length, tooth count, and rotation direction. These details matter more than color or general shape. A replacement blade may look right but still fail during operation. Measure the old part with a ruler or caliper. Take clear photos before removal.

Small differences cause trouble.

From practical repairs, mismatched belts often seem usable at first. Later, they slip, heat up, or damage nearby components. Some catalogues also contain unclear diagrams, so verify measurements with a qualified technician when information conflicts. I would not rely on memory alone. Confirm whether the part fits the engine assembly, transmission, or working attachment. Keep the original component until the replacement matches every important specification. This process takes extra minutes, but it reduces wasted money, unsafe movement, and repeated repairs.

Checking Compatibility, Quality, and Material Standards

How to Choose the Right Power Tiller Parts?

Checking compatibility should begin with measurements, not appearance. Record the shaft diameter, keyway size, mounting-hole spacing, rotation direction, and operating speed. A part that fits loosely may create vibration, heat, and uneven soil preparation. I have learned this the costly way. Fit is not quality.

The FAO Statistical Yearbook 2023 valued global agriculture, forestry, and fishing at about US$3.8 trillion in 2022. That scale makes dependable equipment maintenance important, especially for small farms with limited replacement budgets. Compare the part with the original manual, technical drawing, or verified dimensional sheet. ISO 500-1 can help when checking standardized tractor power-take-off dimensions, while ISO 4254-1 provides useful agricultural machinery safety guidance.

Material quality deserves equal attention. Ask for the steel grade, heat-treatment method, hardness range, and corrosion protection. ASTM material specifications can support traceability, but paperwork alone is not proof of performance. Look for batch identification and test records. Check welded areas for rough beads, cracks, and sharp edges. Seals should remain flexible, not brittle, after storage.

Measure twice. Install once.

Even certified material can fail when lubrication is poor or loading exceeds the design. Soil type, stone content, and working depth change the real stress on gears and blades. A cheaper part may be acceptable for light seasonal use, but that assumption needs testing in the field. Keep the failed component for comparison; small differences often reveal the true cause.

Comparing Costs, Brands, and Replacement Options

Choosing power tiller parts requires more than comparing shelf prices. USDA Economic Research Service data placed U.S. farm production expenses near $458 billion in 2023. Small maintenance decisions still affect this large cost structure. A low-priced belt may stretch quickly, damage the pulley, and create extra downtime. I have made that mistake. The invoice looked attractive, but the repair became twice as expensive.

Compare three replacement routes: original-specification parts, compatible aftermarket parts, and professionally remanufactured components. Original-specification parts usually provide the clearest fit and service documentation. Aftermarket parts can reduce purchase costs, but dimensions and material quality vary. Remanufactured parts may offer value when housings remain sound. Check shaft diameter, belt profile, bearing seals, and mounting-hole spacing before ordering. Measure twice.

The OECD-FAO Agricultural Outlook 2023-2032 projected global agricultural output growth of about 1.1% annually. That trend increases pressure to keep compact machinery operating during narrow planting windows. For cost control, record the part price, shipping charge, installation time, and expected service interval. A 20% cheaper component is not economical if it lasts half as long. Ask for test data, warranty terms, and batch traceability. Be cautious with vague claims. Local fit matters more than a polished catalog.

Installing and Maintaining Power Tiller Parts Safely

Choosing the right power tiller parts matters, but safe installation matters more. Match each component with the machine’s model, year, and operating conditions. Check the service manual before removing covers or belts. A correct-looking part can still have the wrong thickness, mounting holes, or rotation direction. Measure twice.

Before installation, park the tiller on firm, level ground. Turn off the engine, remove the ignition key, and disconnect the spark plug lead. Let hot components cool completely. Wear gloves and eye protection, but keep loose clothing away from moving parts. Use the specified torque for bolts and replace damaged fasteners. Never bypass guards or safety switches. Safety comes first. I have seen rushed repairs create vibration, loose bolts, and expensive damage. A careful inspection takes less time than repeating the job.

Tips: Photograph cable routing before removal. Clean mud from shafts and housings. Apply only the recommended lubricant. Check belts, pins, and retaining clips for wear. After assembly, rotate moving parts by hand when safe. Then start the tiller outdoors at low speed and listen for scraping, knocking, or uneven movement. Stop immediately if anything feels wrong. Recheck alignment and fasteners before continuing. If the repair involves the drive system or feels uncertain, ask a qualified technician to inspect it. My own approach is not perfect; I sometimes recheck simple parts twice. That habit prevents avoidable mistakes.

Subscribe To Our Newsletter

Join our mailing list to receive the latest news and updates from our team.

You have Successfully Subscribed!